Oh, you are going to LOVE these! When the holidays roll around, my kitchen basically turns into a candy-making wonderland, and these Snowman Oreo Balls are always the star of the show. Seriously, they’re ridiculously easy, no baking required at all, which is a lifesaver when you’ve got a million other things going on. I’ve been whipping these up for years, and they never fail to bring smiles to everyone’s faces. They look so cute and festive, and honestly, they taste even better! Trust me, they’re the perfect little bite of Christmas cheer.

Why You’ll Love This Snowman Oreo Balls Recipe
Honestly, this Snowman Oreo Balls Recipe is a total winner for so many reasons. It’s one of those go-to holiday treats that just makes things easier and way more fun. Here’s why it’s become a staple in my house:
Quick and Easy Preparation
Seriously, you can whip these up in no time! It’s mostly just mixing, rolling, and dipping. No oven involved means less fuss and definitely less cleanup, which is a huge win in my book.
Perfect for Holiday Parties
These little guys are SO festive and cute, they instantly make any holiday spread pop. They’re the perfect size for a little sweet bite, and guests always rave about them. They’re a guaranteed hit at any Christmas party or cookie exchange.
Fun for All Ages
Kids absolutely adore making these! It’s a fantastic activity to do with them, and they get so proud of their little snowman creations. But don’t think it’s just for the little ones – adults get a kick out of them too, both making and eating!
Assembling Your Snowman Oreo Balls Ingredients
Okay, let’s get down to business! Gathering your ingredients is half the fun. For these adorable Snowman Oreo Balls, you’ll need just a few things. Make sure you have everything ready before you dive in, and it’ll make the whole process super smooth. Trust me on this!
Essential Base Ingredients
These are the core components that make up the delicious inside of our snowmen. You’ll need about 36 regular Oreo cookies – and make sure they’re crushed up super fine, like sand! Then, grab one 8-ounce package of cream cheese; the most important thing here is that it’s softened to room temperature so it mixes in easily. No lumps allowed!
Decorating Supplies for Snowman Charm
Now for the fun part – making them look like snowmen! You’ll need about 1 cup of white chocolate chips for dipping, along with 1 tablespoon of vegetable shortening to help it melt nice and smooth. For the noses, grab some orange candy melts. Then, get your black decorating icing ready in a piping bag with a fine tip – this is for the cute little eyes and buttons. And don’t forget red or green decorating icing, also piped finely, for their scarves! A few small candies or sprinkles can add some extra flair to those scarves, too.
Step-by-Step Guide to Making Snowman Oreo Balls
Alright, let’s dive into making these adorable Snowman Oreo Balls! It’s really straightforward, and honestly, the most fun part is decorating them to give each one its own personality. Just follow along, and you’ll have a whole crew of cute little snowmen in no time!
Preparing the Oreo Ball Mixture
First things first, we need to get our Oreo base ready. Take all 36 of your regular Oreo cookies and crush them up into fine crumbs. A food processor works like a charm here, but you can totally do it in a zip-top bag with a rolling pin if you don’t have one – just get them as fine as you can! Then, dump those crumbs into a bowl with your softened cream cheese. Mix it all up really well until it’s completely combined and there are no creamy cheese streaks left. It should look like a nice, uniform dough. Now, roll this mixture into small balls, about 1 inch in diameter. I usually get about 36 balls from this amount.
Chilling the Oreo Balls
This step is super important, so don’t skip it! Pop those little balls onto a baking sheet lined with parchment paper and stick them in the fridge for about 15 to 20 minutes. This helps them firm up, which makes them way easier to dip in chocolate without falling apart. You want them nice and solid, but not rock hard.
Coating with White Chocolate
While your balls are chilling, let’s get the white chocolate ready. In a microwave-safe bowl, combine your white chocolate chips and the tablespoon of vegetable shortening. Microwave it in 30-second intervals, stirring really well after each one. Keep going until it’s all melted and super smooth. Be careful not to overheat it, or the chocolate can get thick and seize up – that’s no fun! Once it’s melted and smooth, take your chilled Oreo balls and dip each one into the white chocolate, making sure to coat it completely. A fork or a toothpick works great for this. Let any excess chocolate drip off before placing the coated balls back onto your parchment-lined baking sheet.

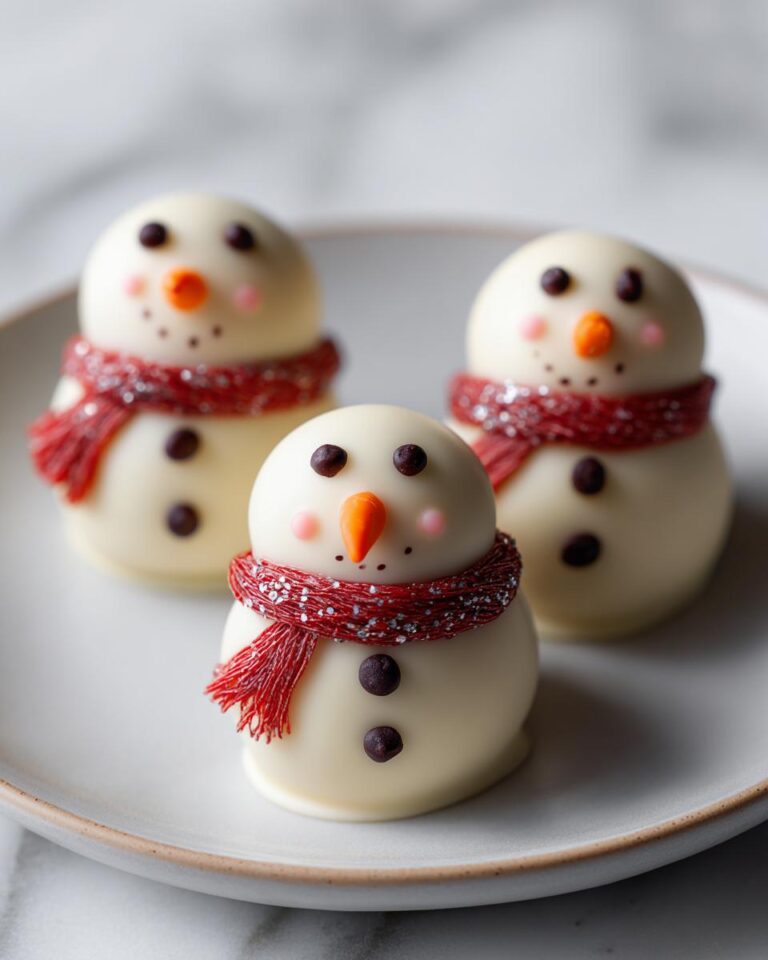
Bringing Your Snowmen to Life
And now for the best part – making them look like snowmen! Grab your melted orange candy melts. You can just dab a tiny bit on the face area and stick on a little triangle for the nose, or use a toothpick to draw a small carrot shape. Next, use your black decorating icing to carefully draw on two little eyes and a few buttons down the “belly.” For the scarves, use your red or green decorating icing to pipe a line around the “neck” area. You can even add some tiny sprinkles or candies onto the scarf for extra detail if you want!
Setting and Finishing Touches
Once all your snowmen are decorated, you just need to let that chocolate set completely. You can leave them at room temperature if your kitchen isn’t too warm, or pop them back in the fridge for about 10 minutes to speed things up. Once the chocolate is firm, your adorable Snowman Oreo Balls are ready to be gobbled up!
Tips for Perfect Snowman Oreo Balls
Making these Snowman Oreo Balls is pretty foolproof, but a few little tricks can make them absolutely perfect every single time. I’ve learned a thing or two over the years, and I’m happy to share them so your snowmen turn out like little edible masterpieces!
Achieving the Right Consistency
Seriously, the cream cheese has to be soft! If it’s cold, your mixture will be lumpy and hard to roll. Leave it on the counter for at least an hour. And for the Oreos, make sure they’re crushed into a fine powder – no big chunks! It makes the balls easier to form and gives them a smoother texture. Think fine crumbs, almost like flour.
Smooth Chocolate Coating Techniques
Melting the white chocolate is key. Don’t just blast it in the microwave. Use short bursts (like 20-30 seconds) and stir really well in between. If it gets too hot, it’ll seize up and become clumpy. Adding that little bit of shortening really helps make it smooth and spreadable. When you dip, a fork is your best friend! Let the excess drip off before placing it on the parchment paper. A gentle tap can help too.
Creative Decoration Ideas
Don’t be afraid to get creative here! You can use different colored sprinkles for scarves, add tiny candy eyes if you don’t want to pipe them, or even use a little bit of melted dark chocolate for facial features if you’re out of black icing. Sometimes I use a small candy corn piece for the nose if I don’t have orange melts. The point is to have fun and make each snowman unique!
Frequently Asked Questions About Snowman Oreo Balls
Got questions about these cute little guys? I’ve got answers! These Snowman Oreo Balls are pretty straightforward, but it’s always good to know the little tricks. Here are some common things people ask:
Can I use different types of Oreos for Snowman Oreo Balls?
You definitely can, but for the best results and that classic taste, I really recommend sticking with regular Oreo cookies. Flavored ones might change the color or the taste too much, and double-stuffed can make the mixture a bit too soft. Regular ones give you that perfect texture and flavor base for your snowmen!
How should I store leftover Snowman Oreo Balls?
Once they’re all set, store your adorable snowmen in an airtight container. They’re best kept in the refrigerator, especially if your house is a bit warm. They’ll stay yummy for about a week, though honestly, they never last that long around here!
Can these Snowman Oreo Balls be made ahead of time?
Oh yes, absolutely! This is one of my favorite things about them. You can make the plain Oreo balls (before dipping in chocolate) a day or two ahead and keep them chilled. Or, you can fully decorate them and store them in the fridge up to a week in advance. They’re perfect for getting a head start on your holiday baking!
What if my white chocolate seizes up?
Don’t panic! If your white chocolate gets thick and clumpy (seizes), it usually means it got too hot or had a tiny bit of water in it. The best fix is to stir in another teaspoon or two of vegetable shortening or a little bit of coconut oil. It should help smooth it out again so you can get those perfect dips for your snowmen!
Estimated Nutritional Information for Snowman Oreo Balls
Just so you know, these numbers are a pretty good estimate for one little snowman ball. They can change a bit depending on how big you roll them or the exact brands you use, but this gives you a good idea. It’s always fun to know what you’re snacking on, right?
- Serving Size: 1 ball
- Calories: 120
- Sugar: 12g
- Sodium: 40mg
- Fat: 7g
- Saturated Fat: 4g
- Unsaturated Fat: 3g
- Trans Fat: 0g
- Carbohydrates: 14g
- Fiber: 1g
- Protein: 2g
- Cholesterol: 10mg
I absolutely LOVE seeing your creations! If you make these adorable Snowman Oreo Balls, please share a picture or tell me how they turned out in the comments below. Did you try a fun decoration? Maybe you have your own little snowman twist? I’d be thrilled to hear all about it and see your festive treats! You can also find more holiday treat ideas on Pinterest.


Amazing Snowman Oreo Balls: 1 Easy Treat
- Total Time: 40 minutes
- Yield: 36 balls
- Diet: Vegetarian
Description
Easy no-bake snowman Oreo balls, perfect for holiday parties. They’re a fun and festive treat everyone will love.
Ingredients
- 36 Oreo cookies
- 1 (8 ounce) package cream cheese, softened
- 1 cup white chocolate chips
- 1 tablespoon vegetable shortening
- Orange candy melts (for noses)
- Black decorating icing (for eyes and buttons)
- Red or green decorating icing (for scarves)
- Small candies or sprinkles (for scarf details)
Instructions
- Crush Oreo cookies into fine crumbs.
- In a bowl, mix Oreo crumbs and cream cheese until well combined.
- Roll the mixture into small balls, about 1 inch in diameter.
- Chill the balls for 15-20 minutes.
- Melt white chocolate chips and shortening in a microwave-safe bowl until smooth.
- Dip each Oreo ball into the melted white chocolate, coating completely.
- Place coated balls on parchment paper.
- Use orange candy melts to create small carrot noses and attach them to the snowman’s face.
- Use black decorating icing to draw eyes and buttons.
- Use red or green decorating icing to create scarves and add small candies or sprinkles for detail.
- Allow the chocolate to set completely before serving.
Notes
- For best results, use regular Oreo cookies.
- Ensure cream cheese is fully softened for easy mixing.
- Melt chocolate in short intervals to prevent burning.
- Get creative with decorating to make each snowman unique!
- Prep Time: 30 minutes
- Cook Time: 10 minutes
- Category: Dessert
- Method: No-bake
- Cuisine: American


 15")